VANILLA - internet services, simple.
About Vanilla
Vanilla keeps everything as simple as possible (and when its not simple we will do our best to explain things simply or recommend someone to come and help).
Please see our ADSL FAQ or contact us if there is anything we can do to assist you with this.
You can download the full wireless TP-LINK ADSL router Manual here
How to setup Vanilla ADSL with a TP-LINK Wireless-G router modem
Before you begin
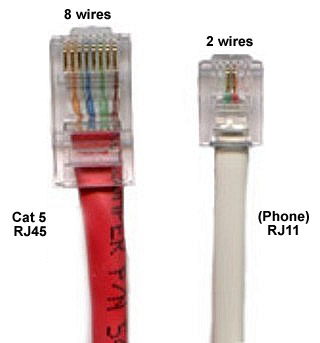
Please ensure that your modem/router is connected to your telephone line by a telephone cable and your computer is connected to your modem/router with a LAN cable. The difference between a telephone cable and a LAN cable can be seen here. Also, you need to conect your router to it's power supply and it's power supply to a free two-prong socket.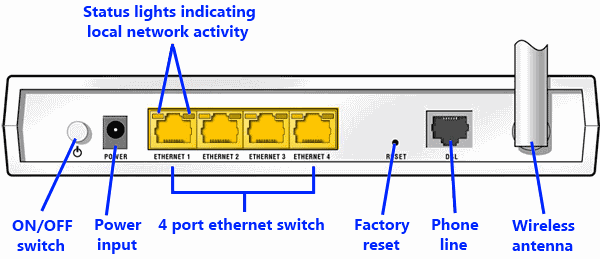
STEP 1: Log into the router from your computer
You will need to have a working network card or port with a computer attached in order to connect to the ADSL router. These instructions assume the default router setup, if they do not work, contact us. This guide assumes that you have set up all the physical conections as per the welcome note, found inside the router's box.
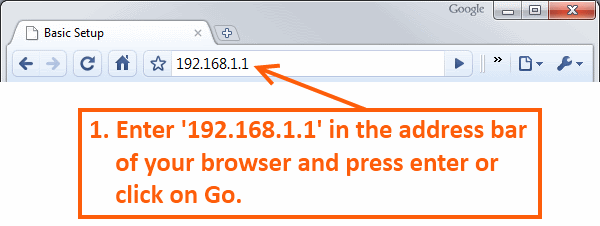
- Open a browser (Internet Explorer, Mozilla Firefox etc.) and type http://192.168.1.1 in the address bar
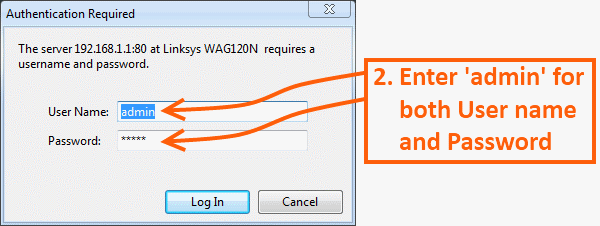
- The browser should ask you for username and password, use username: admin and password: admin (these are the default for Linksys routers, refer to your manual if they don't work)
STEP 2: Configure Internet Settings
- Click on Interface Setup.
- Click on Internet.
- From the Virtual Circuit dropdown select PV4.
- Change the VPI to 8 and the VCI to 35.
- Under the Encapsulation section select PPPoA/PPPoE.
- Enter the username (ie ending with brownie, chocolatechip or vanilla and the password as found of the welcome note we sent you.
- From the Encapsulation dropdown select PPPoE LLC.
- Click SAVE to save the new internet settings.

STEP 3: Configure Local Wireless Settings
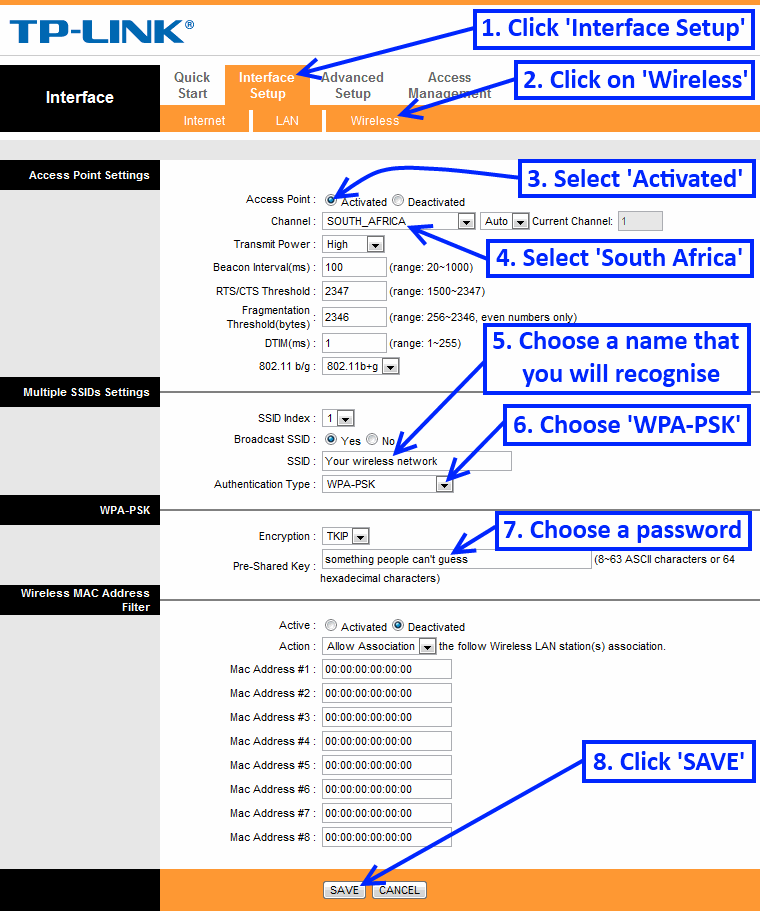
The wireless access point is deactivated by default. To activate it securely follow the steps outlined below.
- Click on Interface Setup.
- Click on Wireless.
- Select Activated.
- From the Channel dropdown select South Africa.
- Choose a name for your wireless access point and enter it next to SSID.
- From the Authentification Type dropdown select WPA-PSK.
- Choose a password that is not easily guessable of at least 8 characters and enter it next to Pre-Shared Key.
- Click SAVE to save the new wireless settings.

