VANILLA - internet services, simple.
About Vanilla
Vanilla keeps everything as simple as possible (and when its not simple we will do our best to explain things simply or recomend someone to come and help).
Please see our ADSL FAQ or contact us if there is anything we can do to assist you with this.
You can download the full Shiro DSL805E user Manual here
How to setup Vanilla ADSL on the Shiro DSL805EU ethernet modem/router
Before you begin
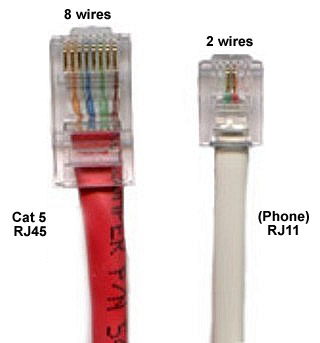
Please ensure that your modem/router is connected to your telephone line by a telephone cable and your computer is connected to your modem/router with a LAN cable. The difference between a telephone cable and a LAN cable can be seen here. Also, you need to conect your router to it's power supply and it's power supply to a free two-prong socket.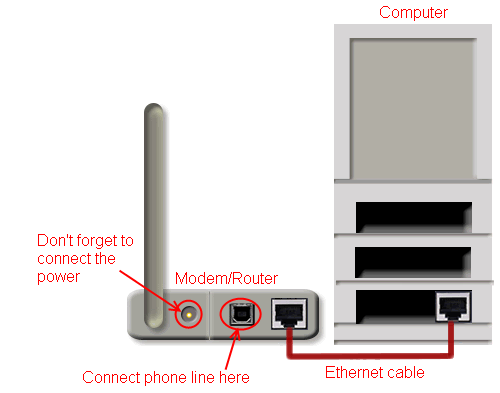
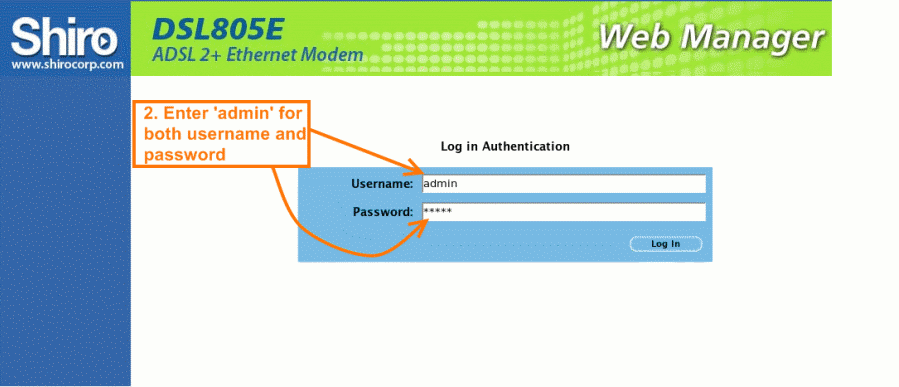
STEP ONE: Log into the router from your computer
You will need to have a working network card or port with a computer attached in order to connect to the ADSL router. These instructions assume the default router setup, if they do not work, call us or your IT support person. This guide assumes that you have set up all the physical conections. Check that the power, LAN and DSL lights are all on and solid. If not, call us to troubleshoot.- Open a browser (Internet Explorer, Mozilla Firefox etc.) and type http://192.168.1.1 in the address bar
- The browser should ask you for username and password, use username: admin and password: admin (these are the default for Shiro routers, refer to your manual if they don't work). We strongly advise that you change these once you've accessed your router.

STEP TWO: Creating a new connection
Hover your mouse over WAN (under Advanced on the left of your screen) and click: New Connection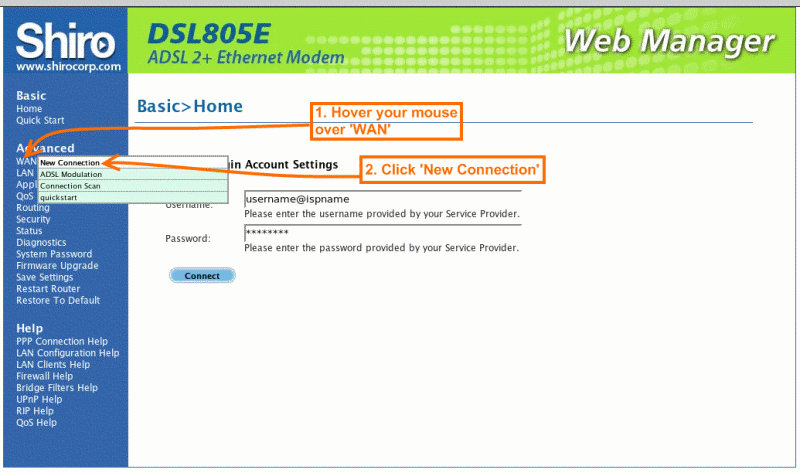
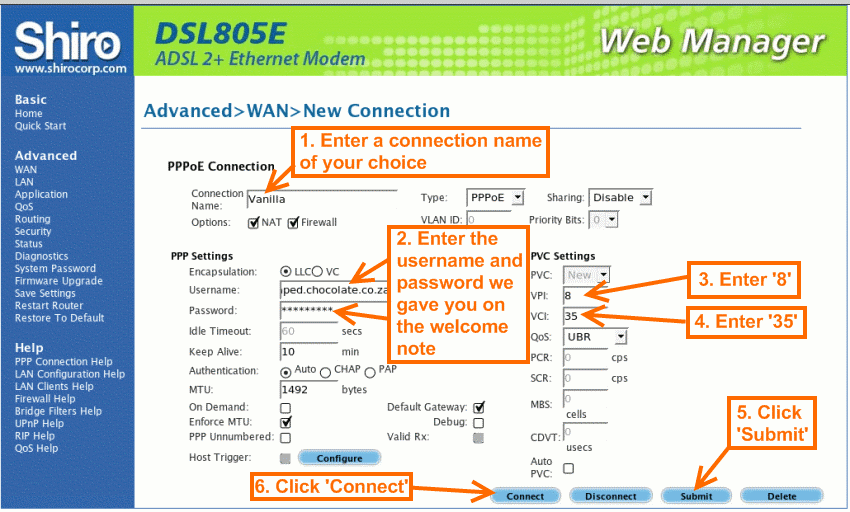
STEP THREE: Configuring your connection
On the configuration page (see below) you will have to fill in a few details. You only need to change the values specified - leave all the others as they are.- Connection Name: [whatever you want]
- Username: [whatever we've given you, eg. account@unshaped.chocolate.co.za]
- Password: [whatever we've given you]
- VPI: 8
- VCI: 35
Click Submit to save settings, then Connect to connect.
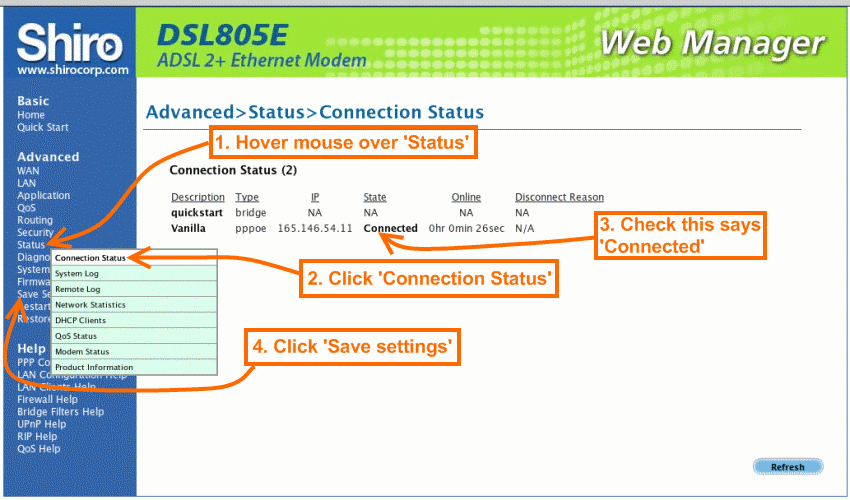
STEP FOUR: Making sure you're connected
Hover your mouse over Status and click Connection Status. You will be presented with a summary of the profiles you created and saved.Check that it says, "Connected" below State.
If so, then congratulations, you've succesfully configured your Shiro DSL805EU modem/router.
NB Make sure that you click Save settings on the left hand panel or else if you turn your router off, you will lose all progress made and will have to setup the router again... Enjoy surfing!
STEP FIVE: Cleaning up
This step is only necassary for advanced users who intend to use the interface regularlyIf you click on WAN and select the quickstart pre-defined profile, you can delete this "connection" by clicking Delete in the bottom right hand corner. This will now make your Vanilla Connection the ONLY profile available to the modem/router. When this is the case, clicking on Home on the left panel will bring up a neat summary of your Connection, Router and LAN information which is very useful. Once again, click Save settings to make you don't lose any changes you've made.

